How cute are these Minnie Mouse hats Maria made for her daughter’s Minnie Mouse 2nd Birthday!
Now you can make them too, with this easy tutorial Maria put together for her blog, Love & Sugar Kisses, and kindly let me repost. Thank you, Maria!

Supplies:
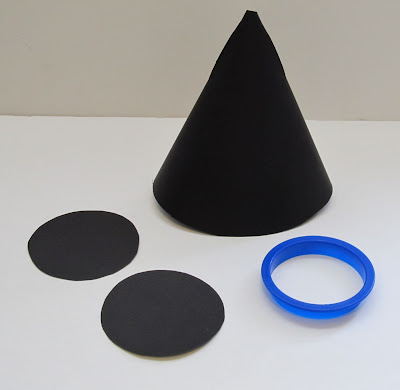
- Black cardstock: one sheet per hat PLUS one sheet for every 2 sets of ears (that’s 4 ears per page)
- Pink polka dot scrapbook paper (or whatever color/pattern you would like for the bow)
- Coordinating ribbon
- Double sided tape
- Hot glue gun
- Exacto knife
- 3 inch round cookie cutter or 3 inch round craft punch
- Medium sized butterfly cookie cutter (optional)
Step 1
Using your cookie cutter as a stencil or your round craft punch, cut out enough ears for your desired number of hats out of the black cardstock.
Step2
Shape a cone out of the black card stock and use double sided tape to seal the seam. You could also use hot glue for this if you want, but tape might be a little less messy. It took a few tries to figure out how to get the cardstock to roll up neatly into the cone shape.
Step 3
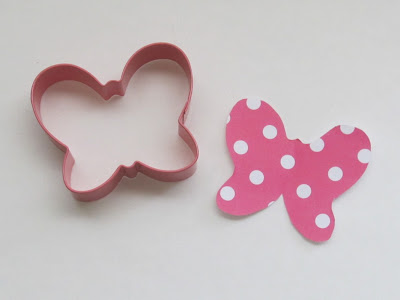
Cut desired number of bows out of your scrapbook paper. You can use a butterfly cookie cutter to trace the basic shape then trim them to your liking, but you can certainly freehand them!
Step 4
Cut your ribbon allowing 2 pieces for each hat. These will be your straps. You can use your child’s head to measure. Plan on about 12 inches per strap.
Step 5
Now you are ready to assemble the hats!
- Cut 2 small slits near the top of the cone using your exacto knife. You will be inserting the ears into these slits. You want them large enough to allow the ears to be attached, but not so big that you lose too much of the rounded shape.
- Apply a small amount of hot glue to the slit and then place each ear inside. You may need to apply a little more to get the ears to adhere. A little goes a long way and isn’t very noticeable on the hat!
- Using the hot glue, attach the ribbon to the inside of both sides of the cone. Make sure you are careful where you place the ribbon so your ears aren’t crooked!
- Finally, attach the bow to the front of the hat using either hot glue or double sided tape.
- You could even jazz these up further with the birthday child and/or the guests initial on the front! Need a Mickey Mouse hat instead? Just leave off the bow and use red ribbon!
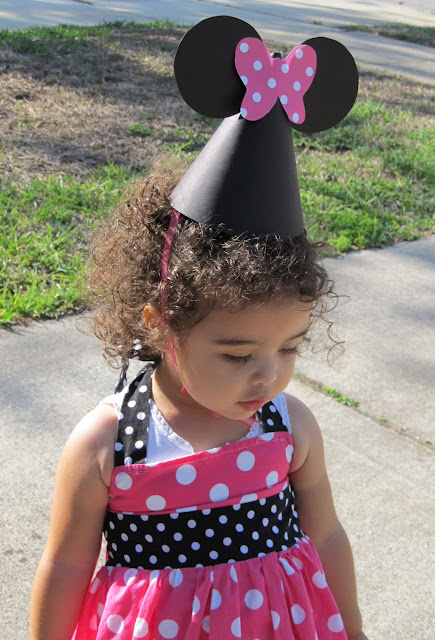
Look, it’s the perfect party hat for your little Mouseketeer!
Maria, we couldn’t agree more. Your daughter is adorable!! Thank you for the tutorial!
Check out more of Maria’s Minnie Mouse 2nd Birthday and see all the beautiful things she created for her daughter’s party. And to learn more about Maria, please visit her blog, Love & Sugar Kisses, where she shares about her love of baking, cake decorating, and crafting.
And finally, if you make your own Minnie Mouse hats, please send photos to [email protected]. I’d love to show them off!
6 comments
Jess wrote:
These are great!! Wish I had this a month ago for my daughter's birthday. This way is so much easier than the way I did them!
Annie wrote:
I can not figure how to do the cone! Can you help me?
brandy wrote:
These are so cute, I am going to try and do these next wee, wish me luck : )
Heather wrote:
I can't figure out how you made the cone! Mine are too small. Help! lol
Vivian S wrote:
vou fazer pro niver de 1 aninho de minha filha lindo amei!!!! parabens
Vivat L wrote:
Great idea, my kids really love it!
To leave a comment Log in -or- Join the party