Here’s a step-by-step guide to making your very own DIY monogram floral centerpiece. This total show-stopper will be the belle of the ball at your next party.
No need to order an expensive floral centerpiece from a florist when you can make your own! This DIY floral centerpiece is perfect for weddings, baby showers, and bridal showers – take a look through our inspiration pages for these events. This Lush pink bridal shower is the perfect scene for one of these floral centerpieces!

Our creative blog contributors, Kristen and Missy from Sweetly Chic Events & Designs, are sharing a monogram floral centerpiece that would look great at a bridal shower, baby shower, or wedding!
Nothing brings a lovely sense of elegance to any event like flowers do! These sweet and simple floral centerpieces would be the perfect touch at any event!
When we found these paper mache letters we thought they would be the perfect way to showcase a fresh take on a floral centerpiece!
Contents
Why You’ll Love This DIY Monogrammed Centerpiece
- Floral gifts: A monogram centerpiece full of beautiful flowers is a lovely gift to give. Make sure you know the color scheme for the recipient’s party.
- Unique design: You have complete control over the design with a DIY monogram floral centerpiece. You can choose the colors, flowers, and arrangements that best fit your style and theme.
- Cost-effective: Making your own monogram floral centerpiece can be more cost-effective than buying a pre-made centerpiece. You can choose less expensive flowers and materials and create a beautiful, unique centerpiece.
- Easy to make: With a little bit of creativity and some basic DIY skills, you can easily make your own monogram floral centerpiece. There are plenty of tutorials and resources available online to help guide you through the process.
- Versatile: A monogram floral centerpiece can be used for various occasions, from weddings and baby showers to birthday parties and dinner parties. You can customize the design to fit the theme of your event.
- Long-lasting: Unlike fresh flower centerpieces, a DIY monogram floral centerpiece can be made with silk or artificial flowers, making it long-lasting and durable. You can also store it and reuse it for future events.
- Focal point: A monogram floral centerpiece can be a beautiful focal point for your table decor. It can draw the eye and create a cohesive look for your overall design. You could also set this up at the entrance of your house, on the porch or doorstep for example.
- No need to worry about ordering from a florist or time of delivery.
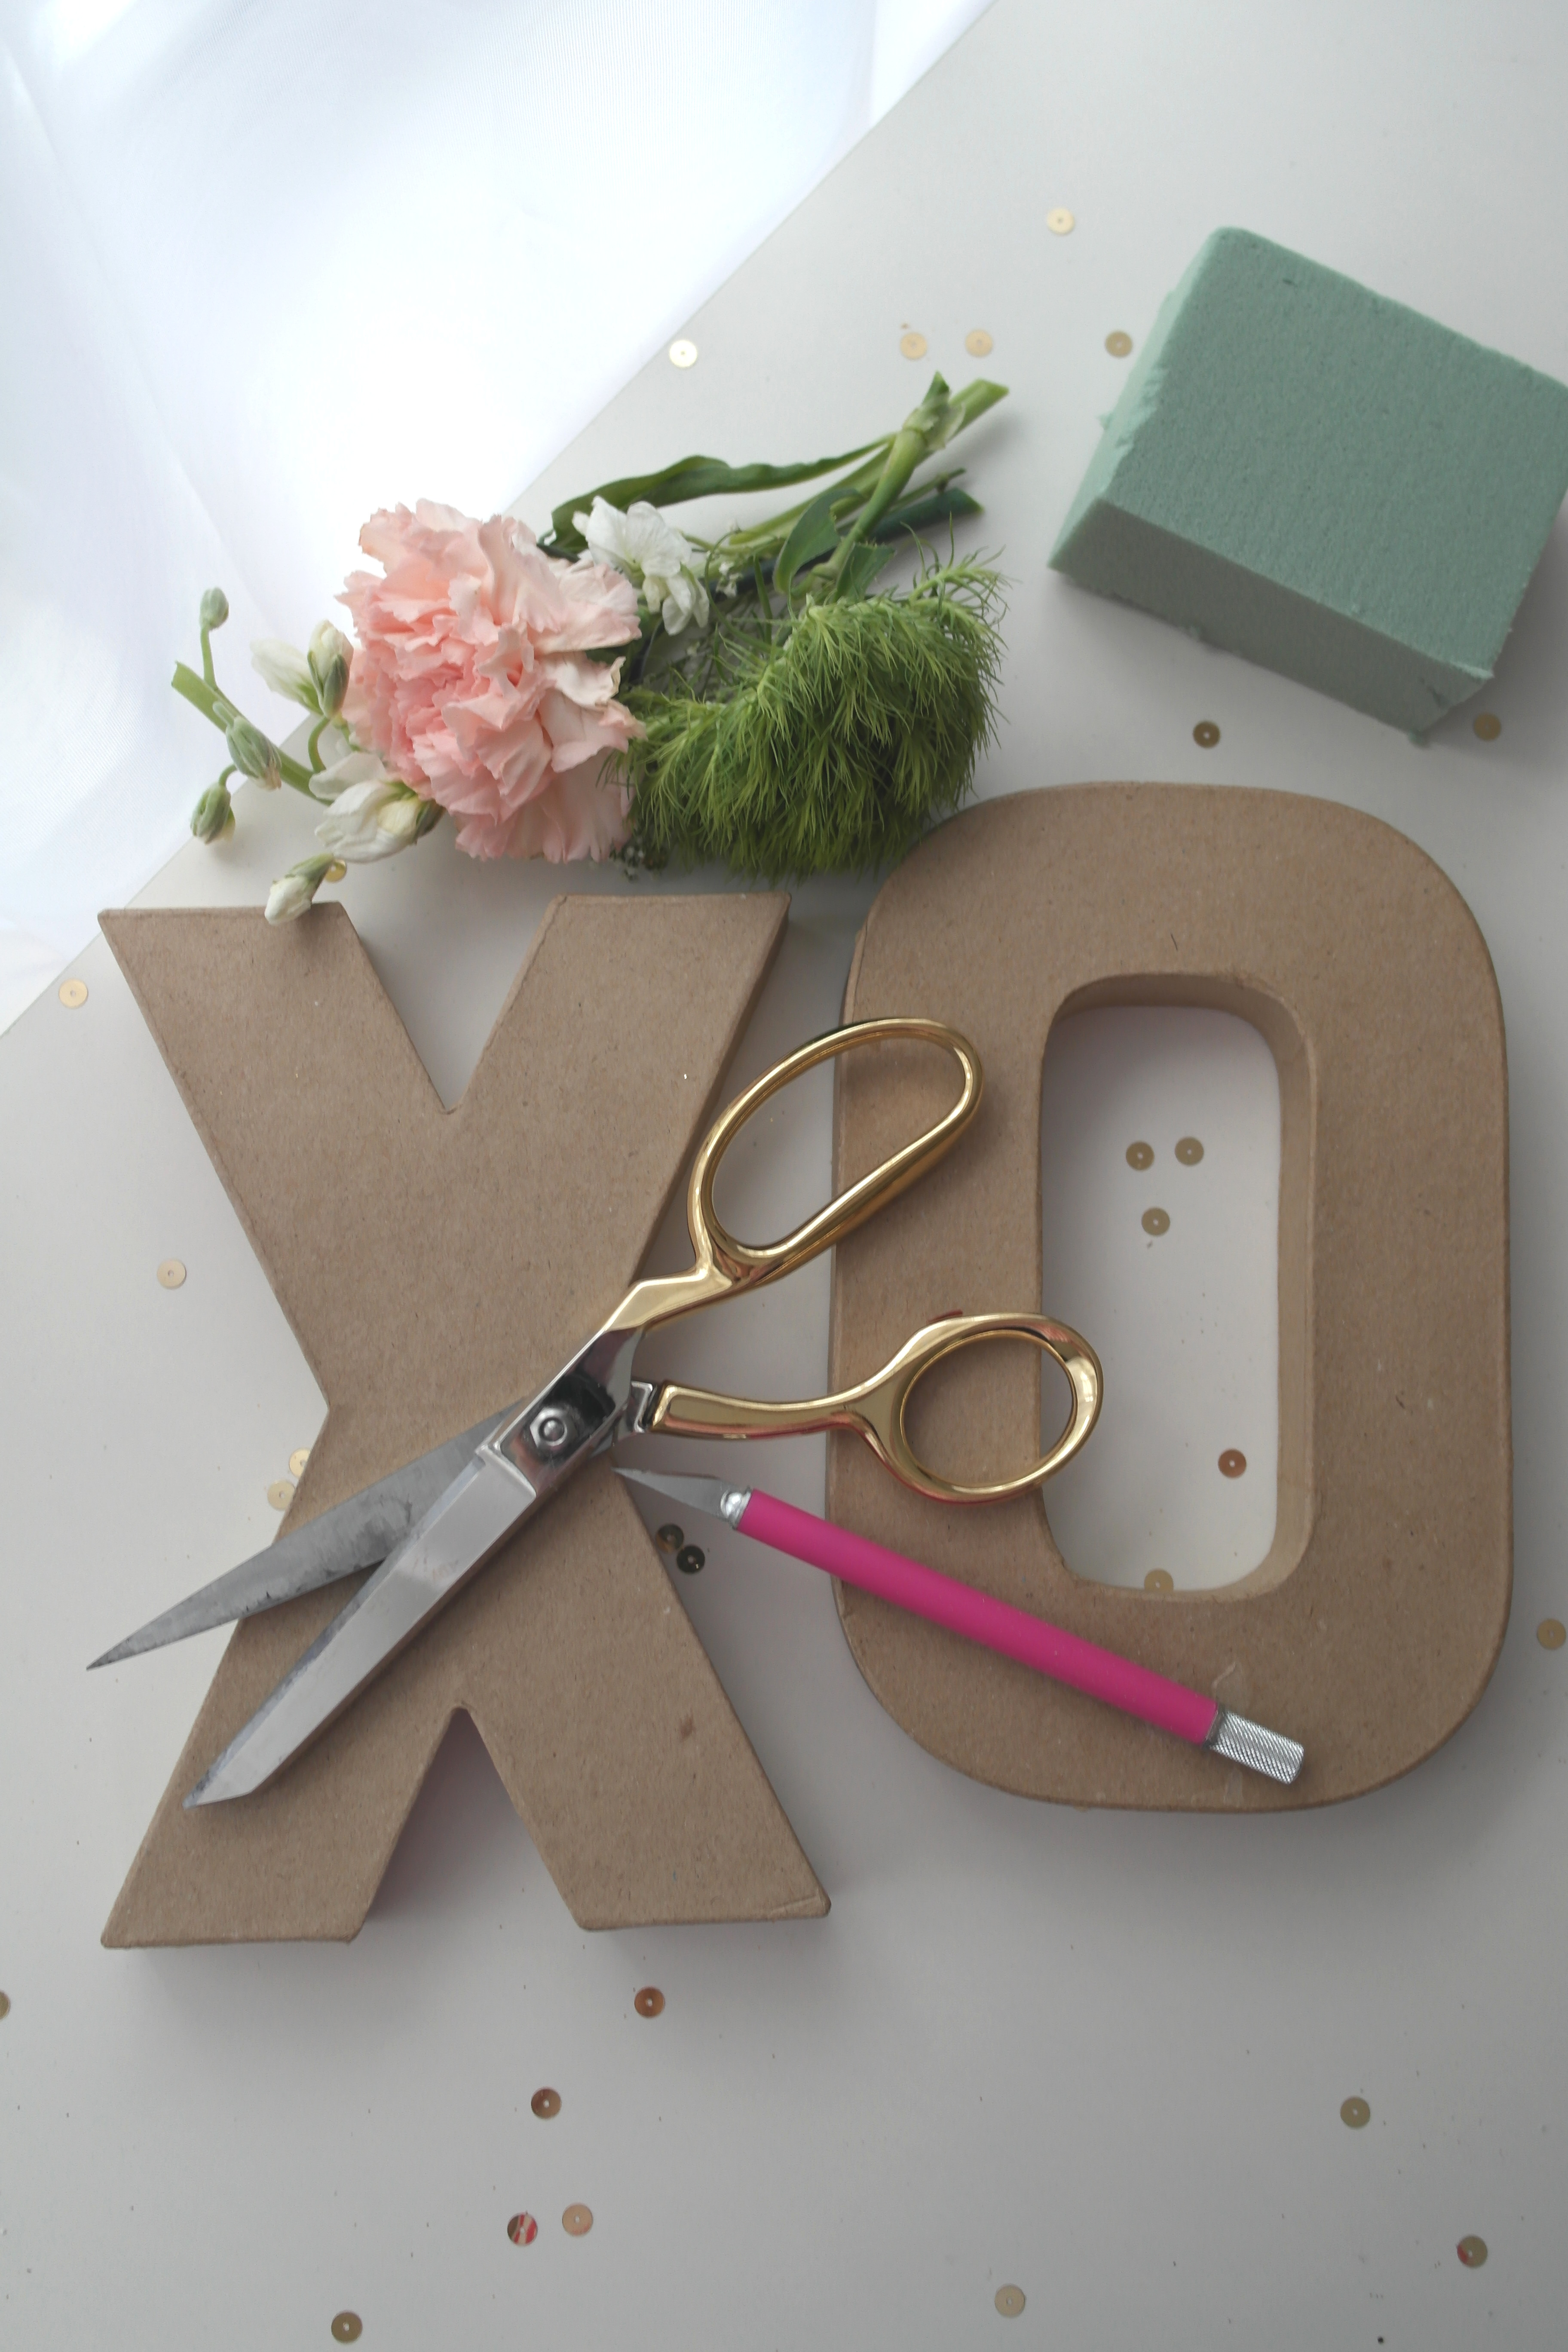
Supplies
- Paper Mache Letters: Choose the letters you want to use for your monogram. You can find these at craft stores or online.
- Fresh Flowers: Choose flowers that complement the colors and style of your event. You can use one type of flower or mix and match it for a more eclectic look.
- Floral Foam: You’ll need this to create a stable flower base. Choose foam that fits inside your Paper Mache letters.
- X-Acto Knife: You’ll need this to cut the floral foam to fit inside your letters.
- Hot Glue Gun: You’ll use this to attach the floral foam to the letters and secure the flowers in place.
- Scissors: You’ll need these to trim the flowers and shape them to fit inside the letters.
How To Make a DIY Monogram Floral Centerpiece
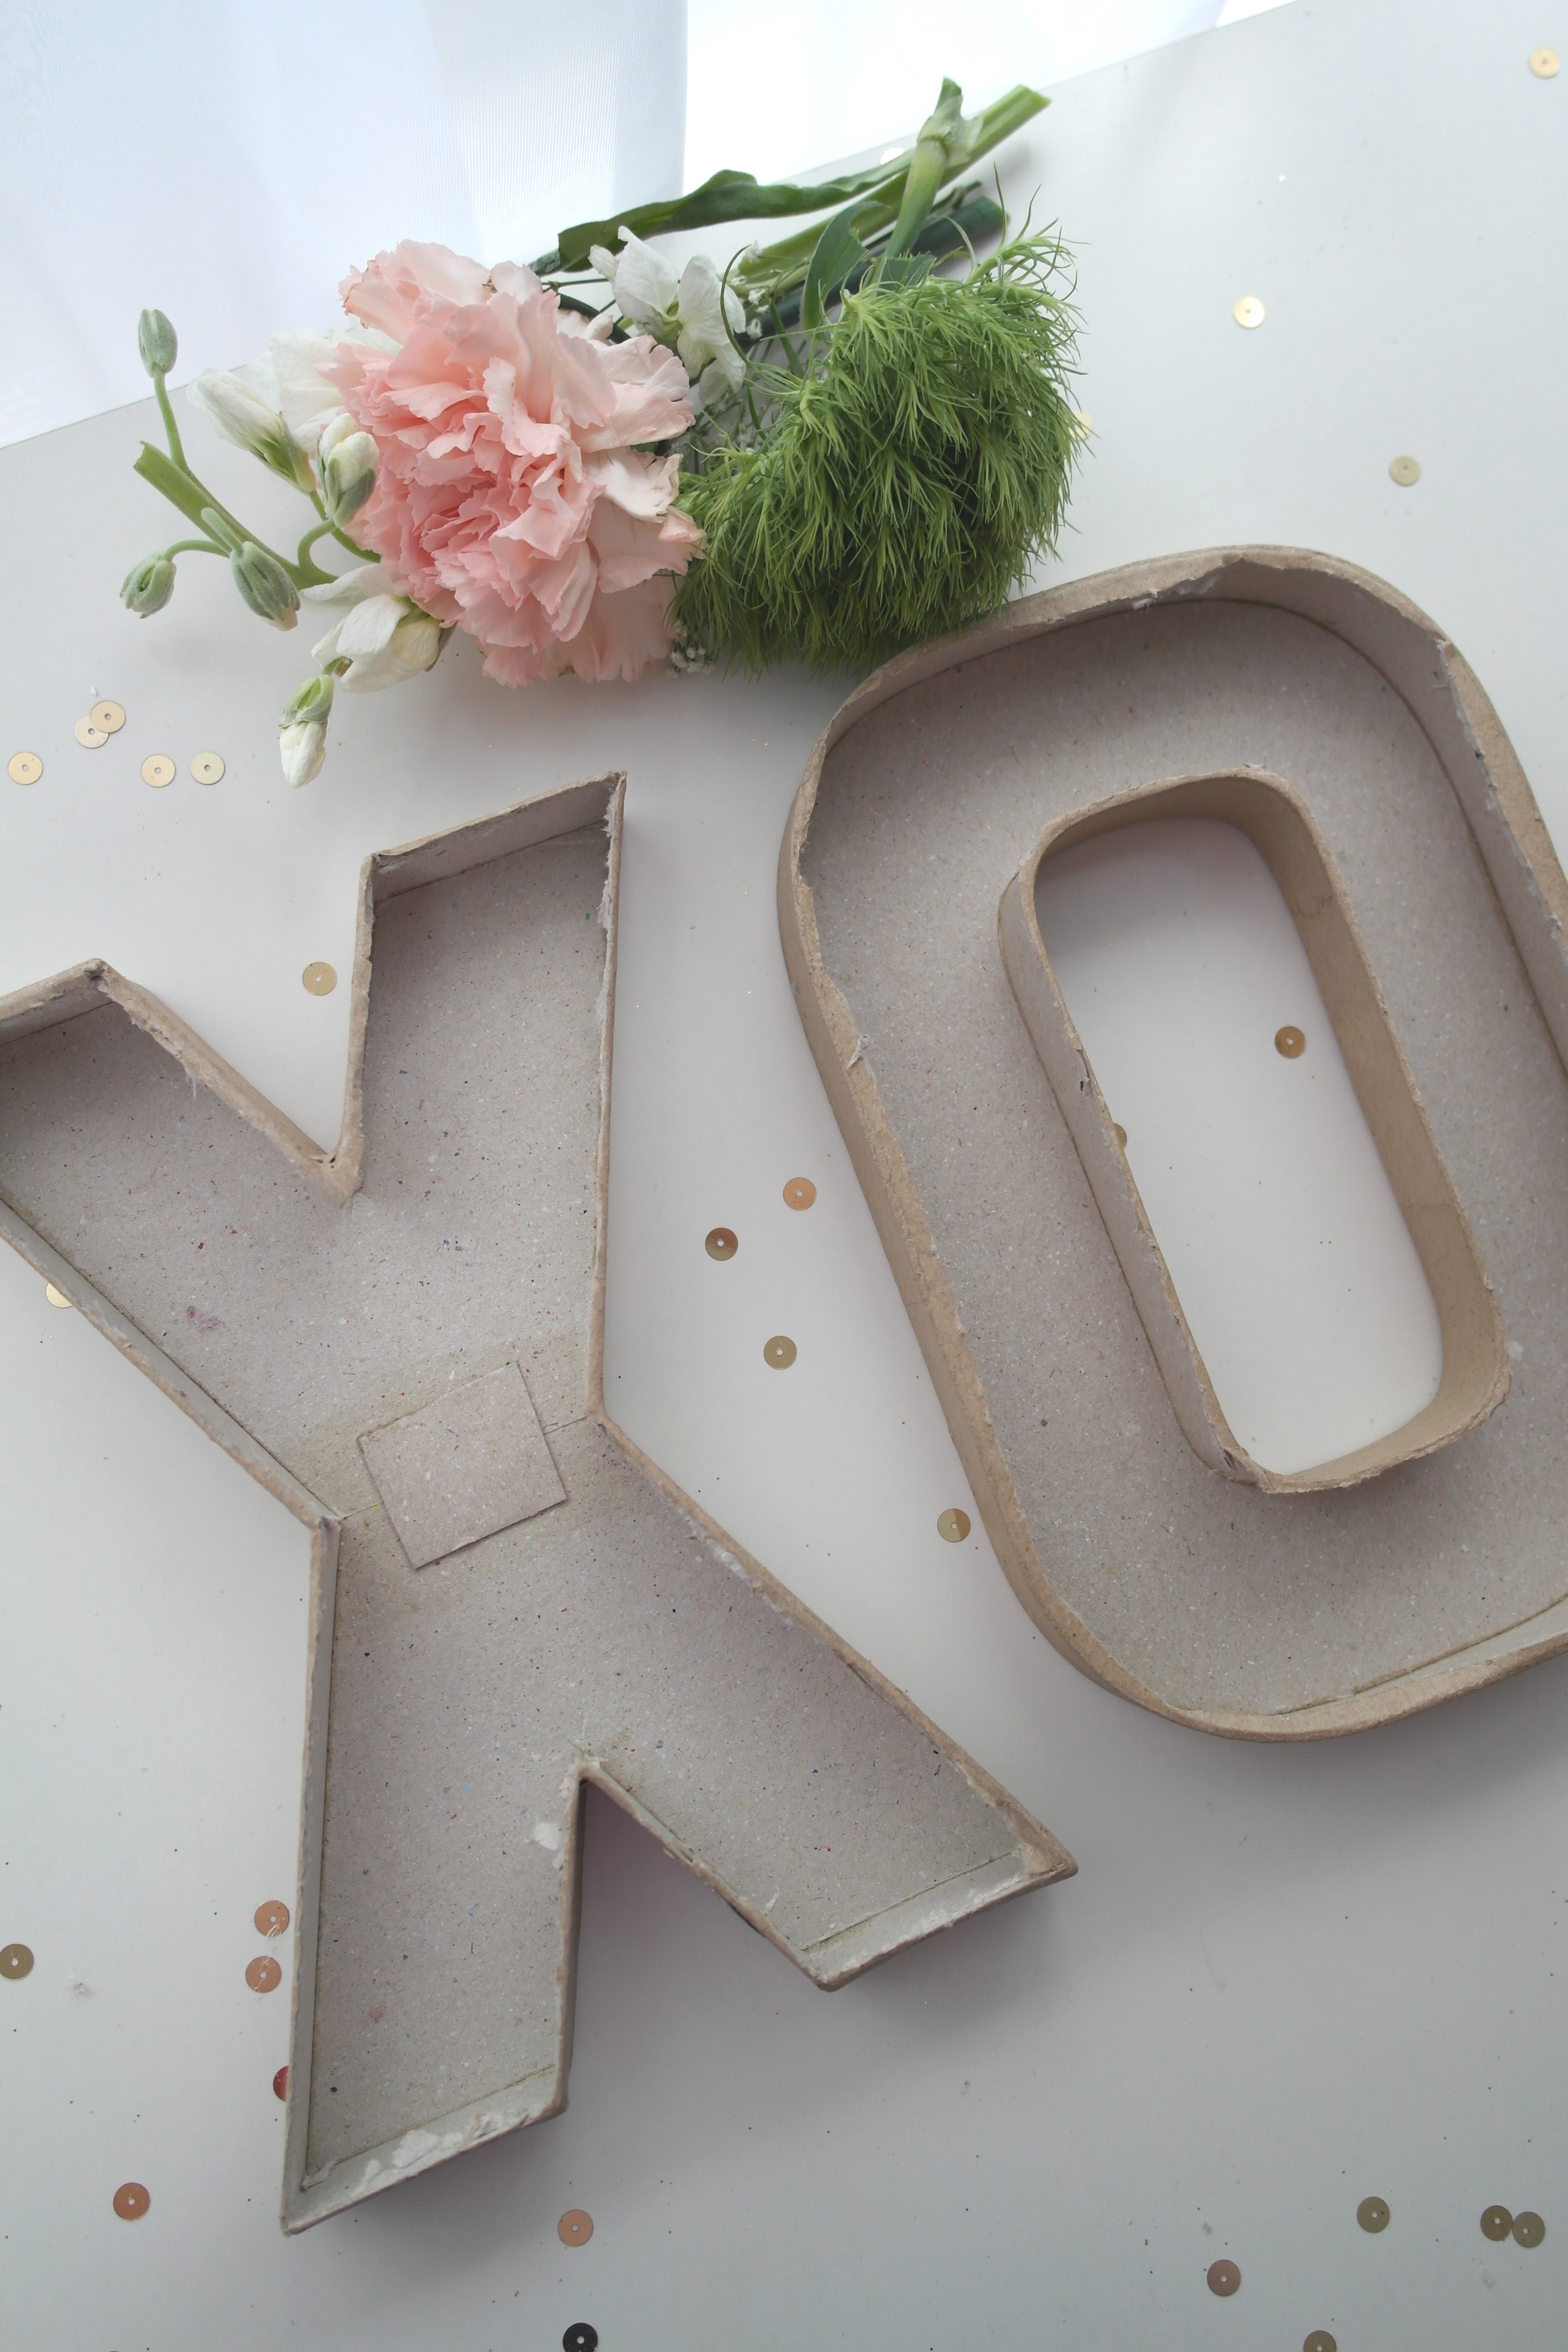
Step 1: Cut into the letters
Start by taking your X-ACTO knife and cut into the front of your first letter where the side and top seam meet.
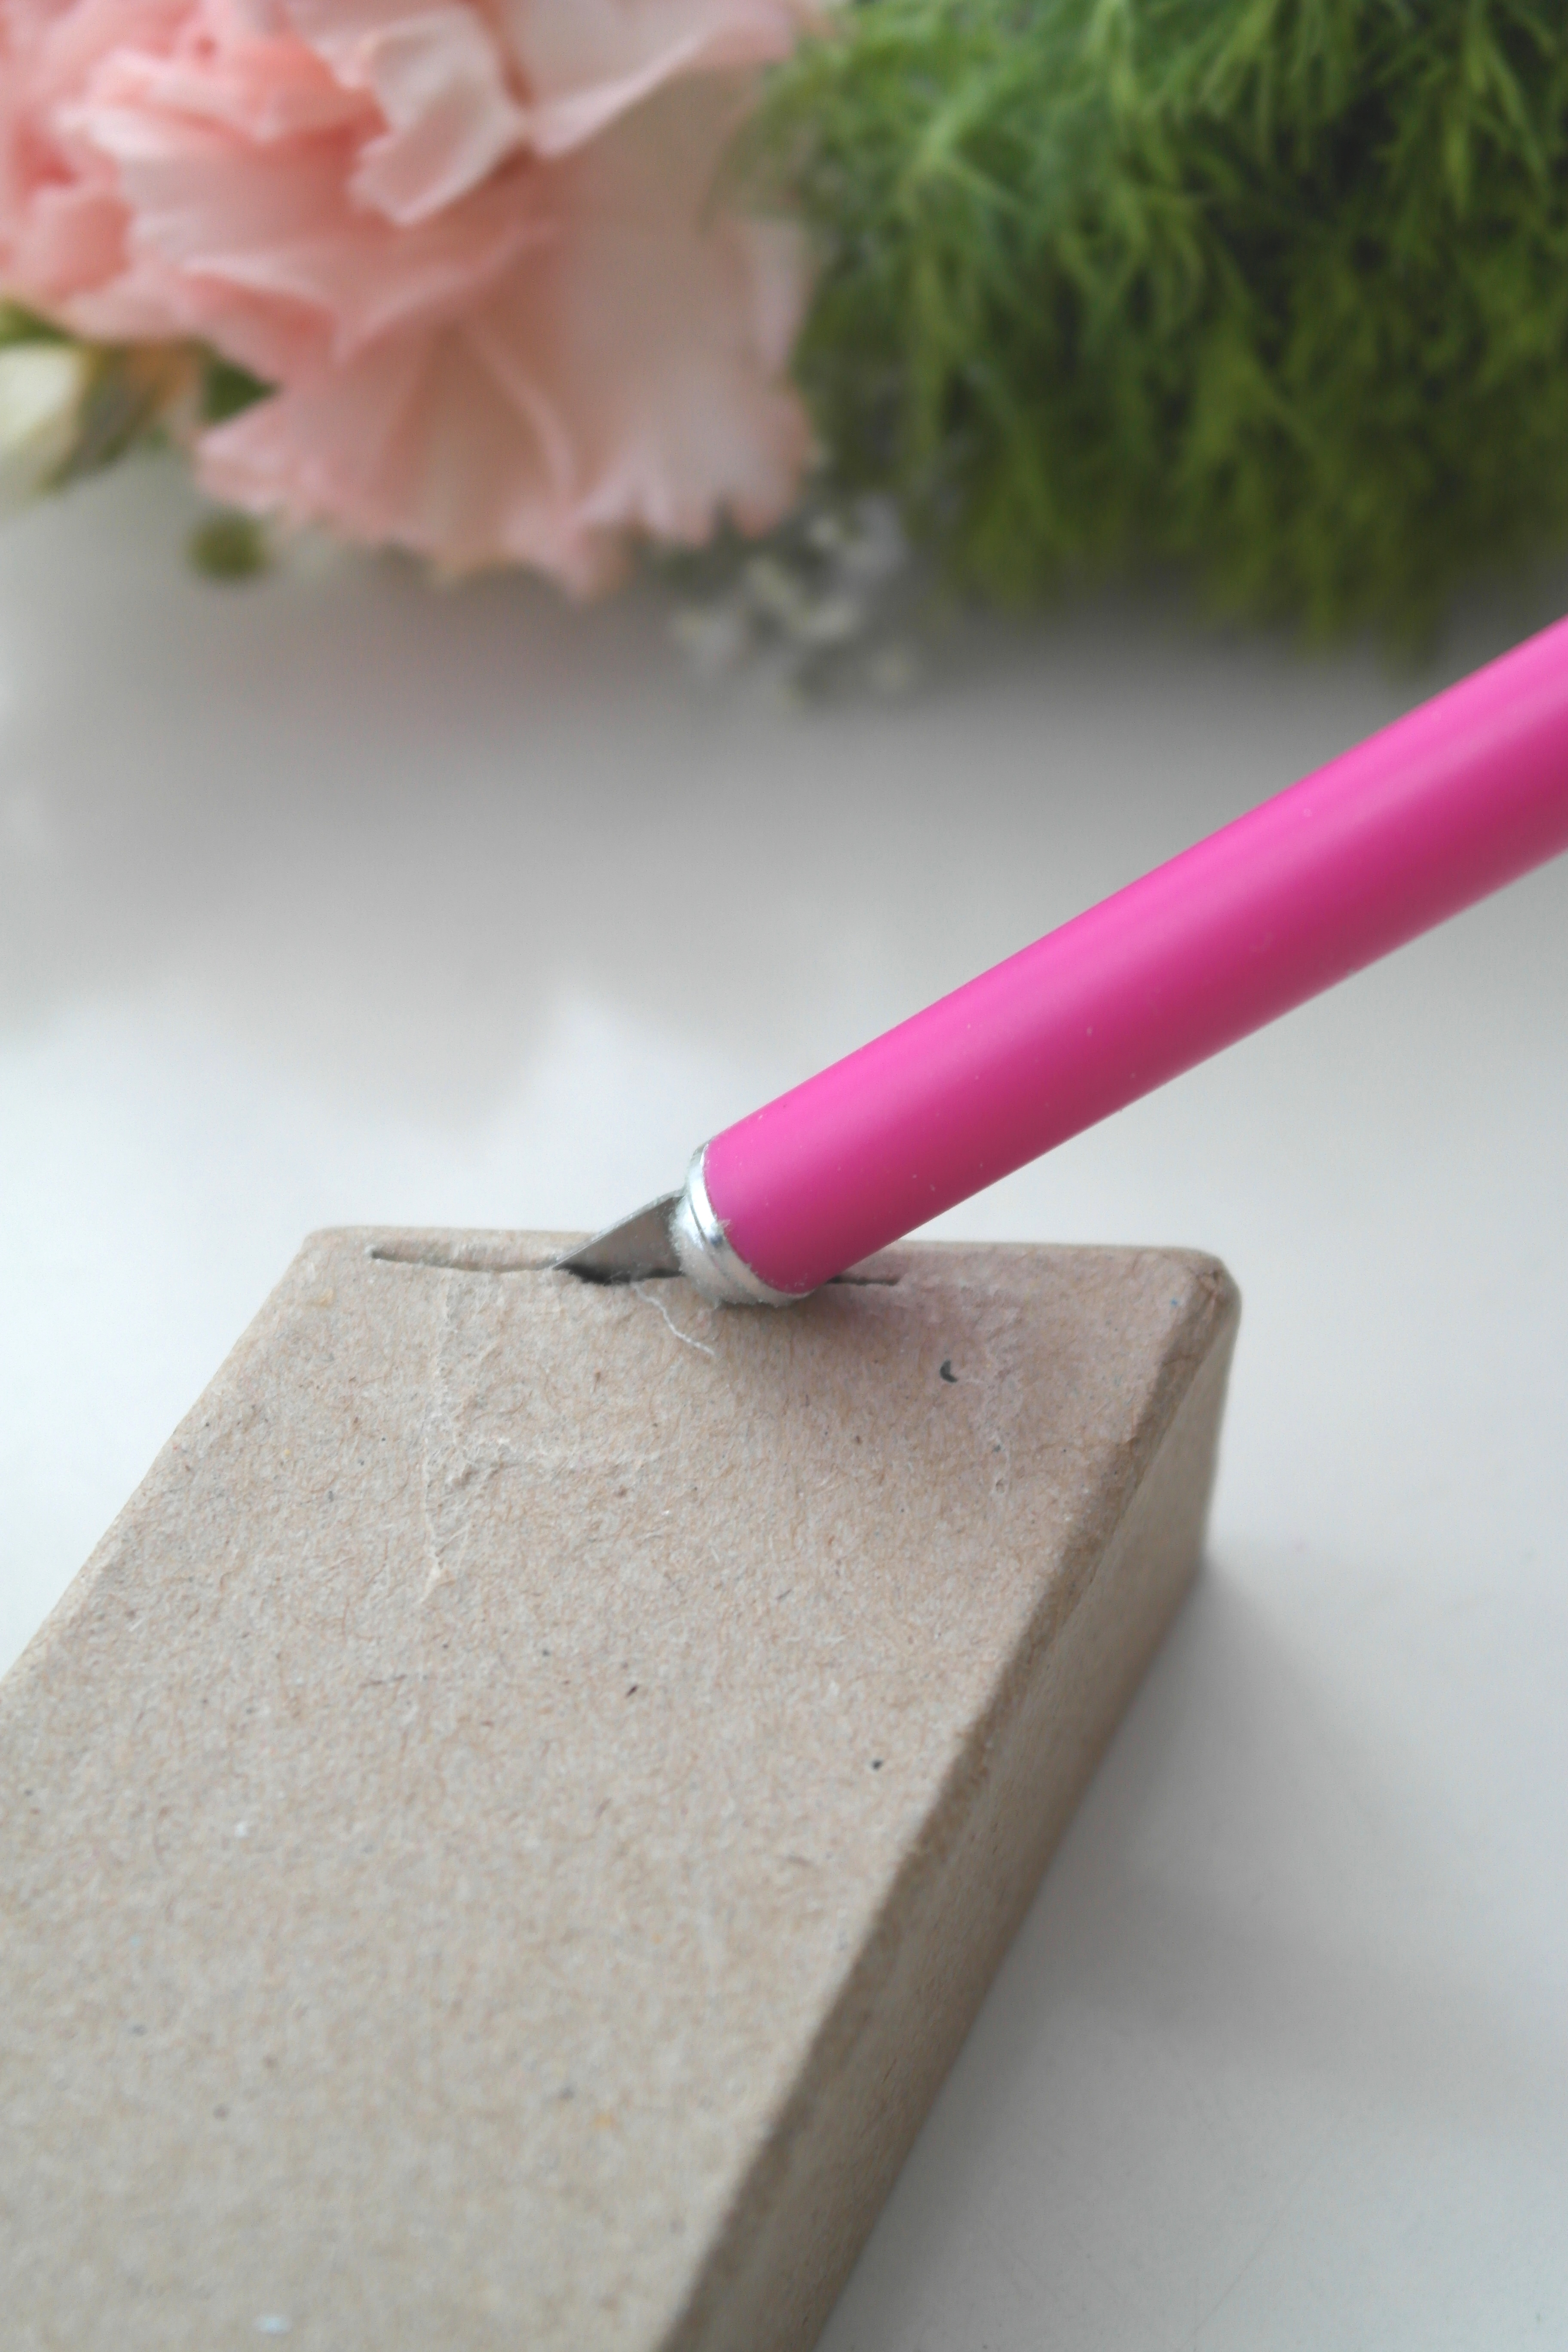
Steadily continue to cut along your letter’s top front seam, leaving the back and sides of your letter intact.

Repeat this step with any additional paper mache letters. Don’t be concerned if your cuts are not perfect; they will be hidden by your fresh flowers!
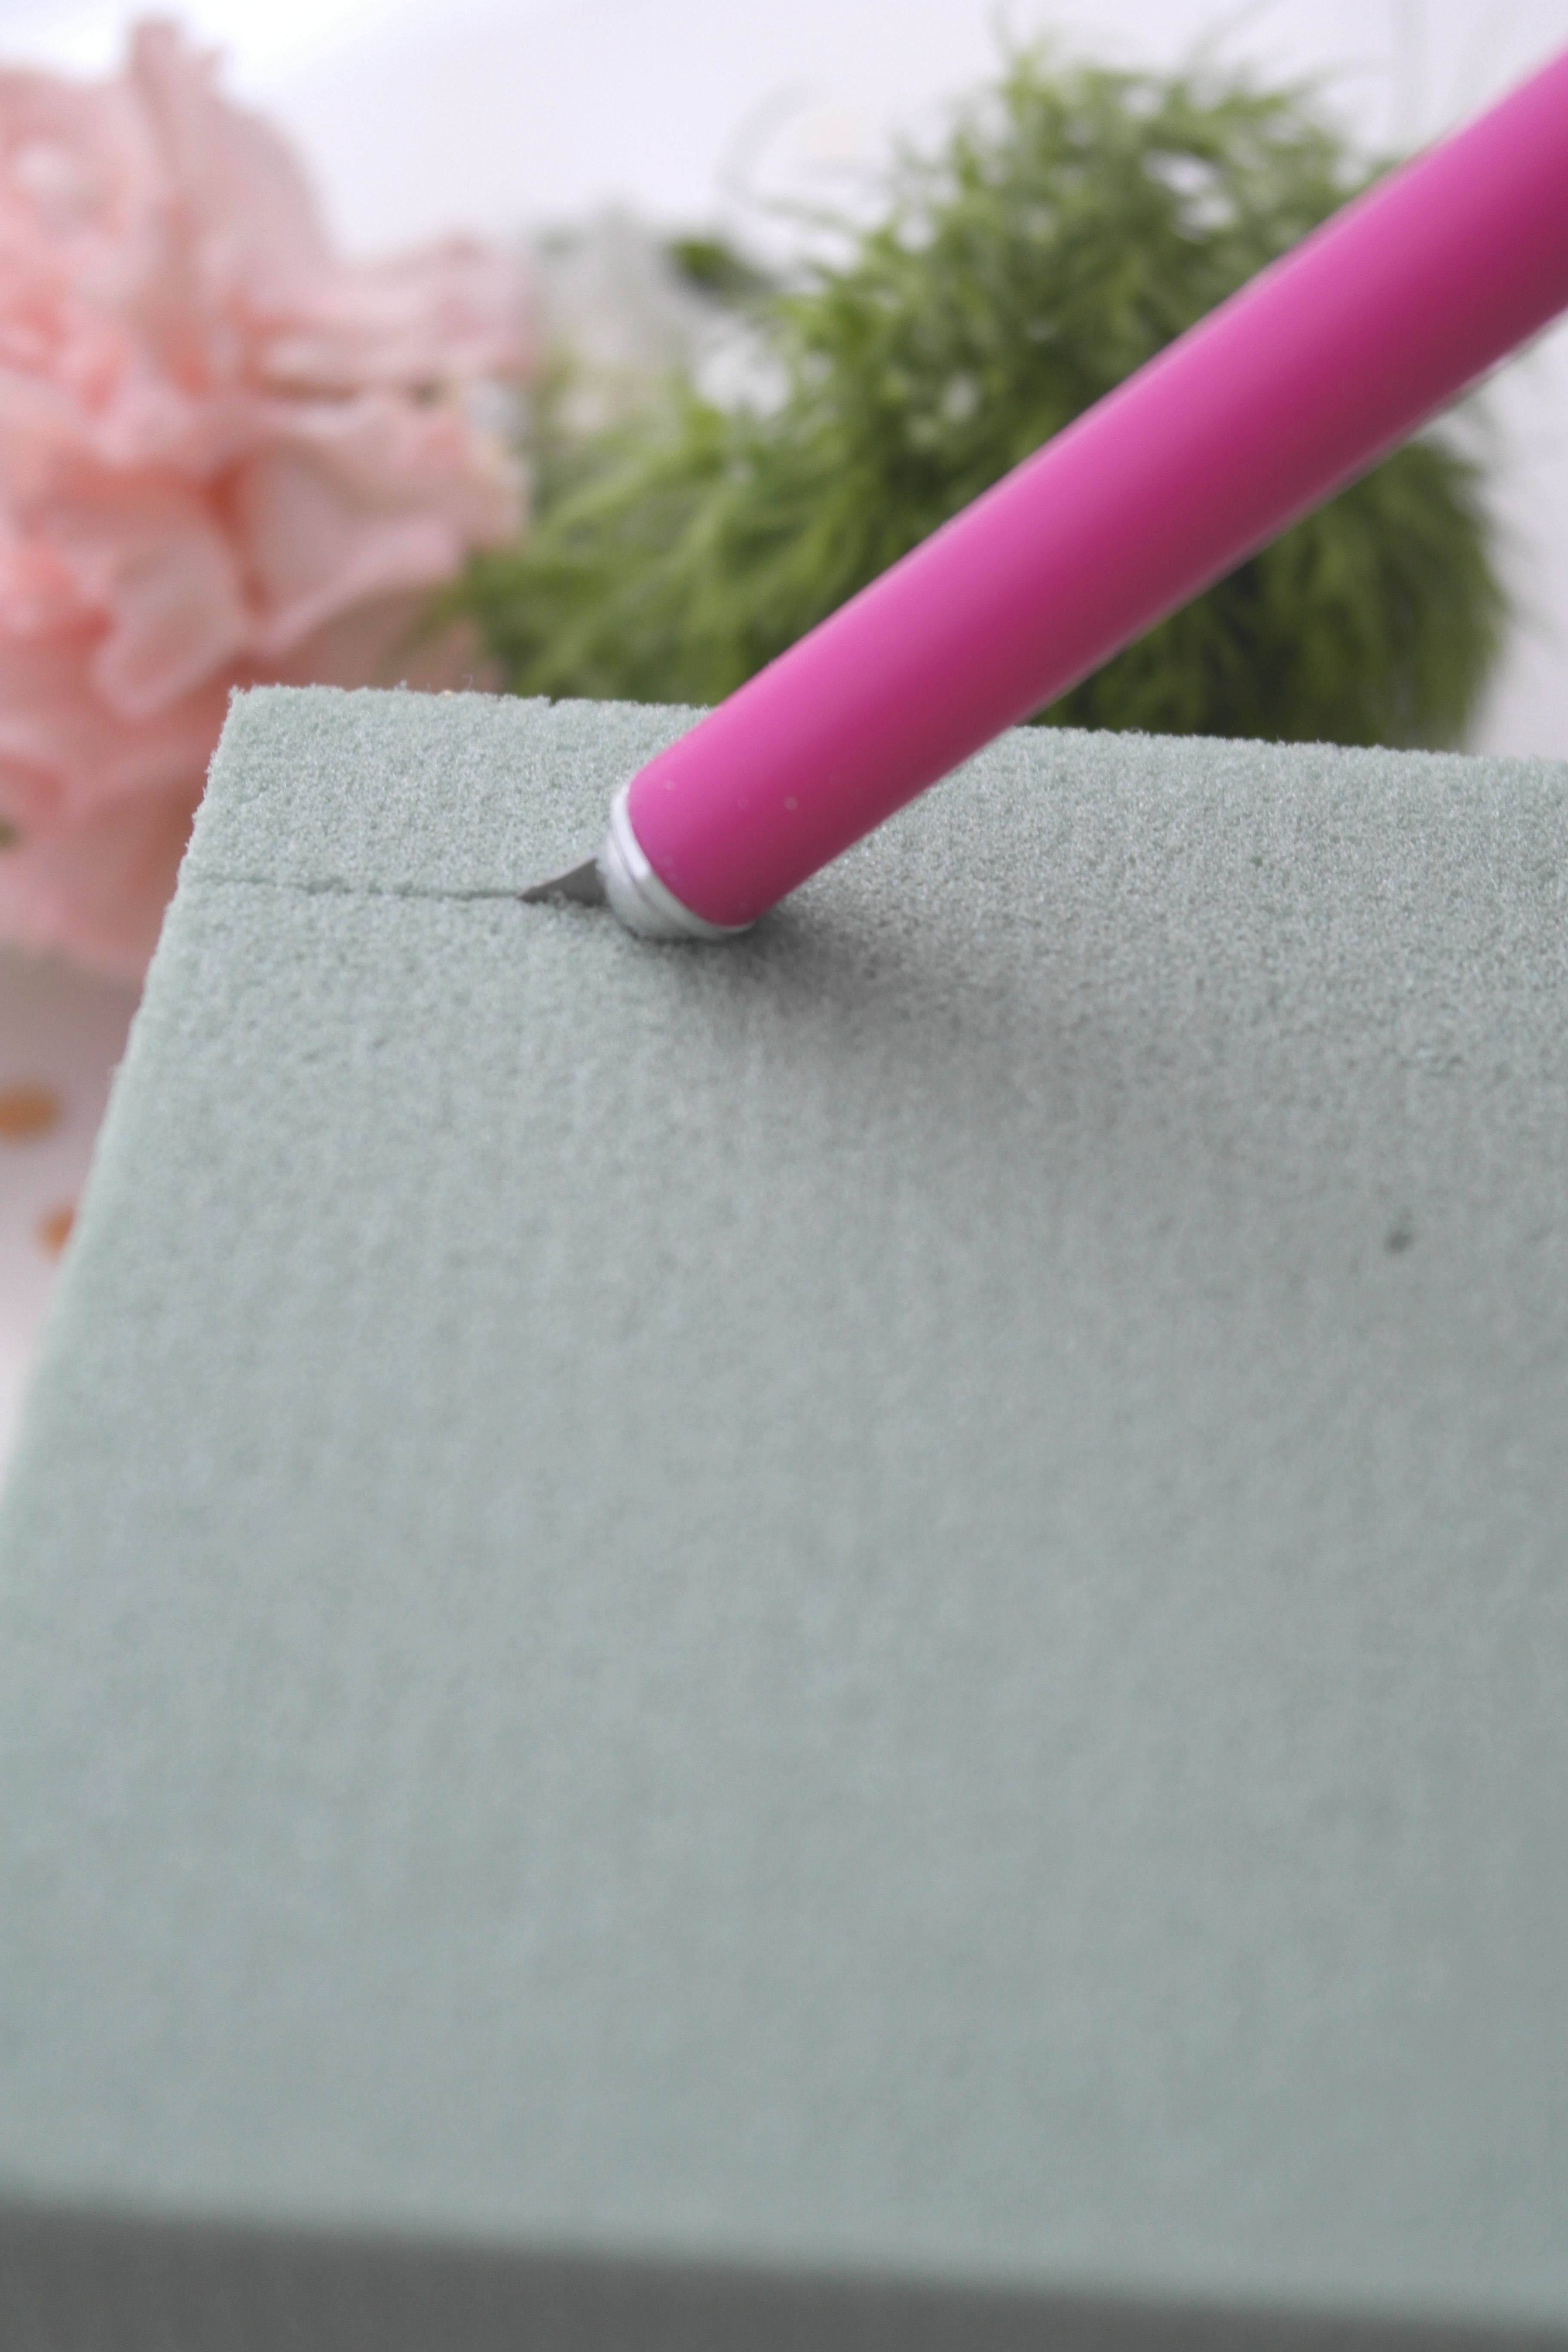
Step 2: Cut your floral foam
Using your X-ACTO knife cut your floral foam and down to size so it fits within the hollowed space of your letter.
Step 3: Hot glue the foam into the letters
Once you have the necessary pieces sized, carefully hot glue them into the letter.

Step 4: Repeat
Now, repeat steps 4 & 5 for any additional letters.

Step 5: Work with the flowers
Next, select chosen flowers and cut them so you have the buds of the flower and a bit of the bud stem remaining. (Approximately ½ inch of stem)


Now it is time to get creative! Carefully place and arrange your flowers into the floral foam. No need to secure the flowers with glue, as the foam will hold them into place!
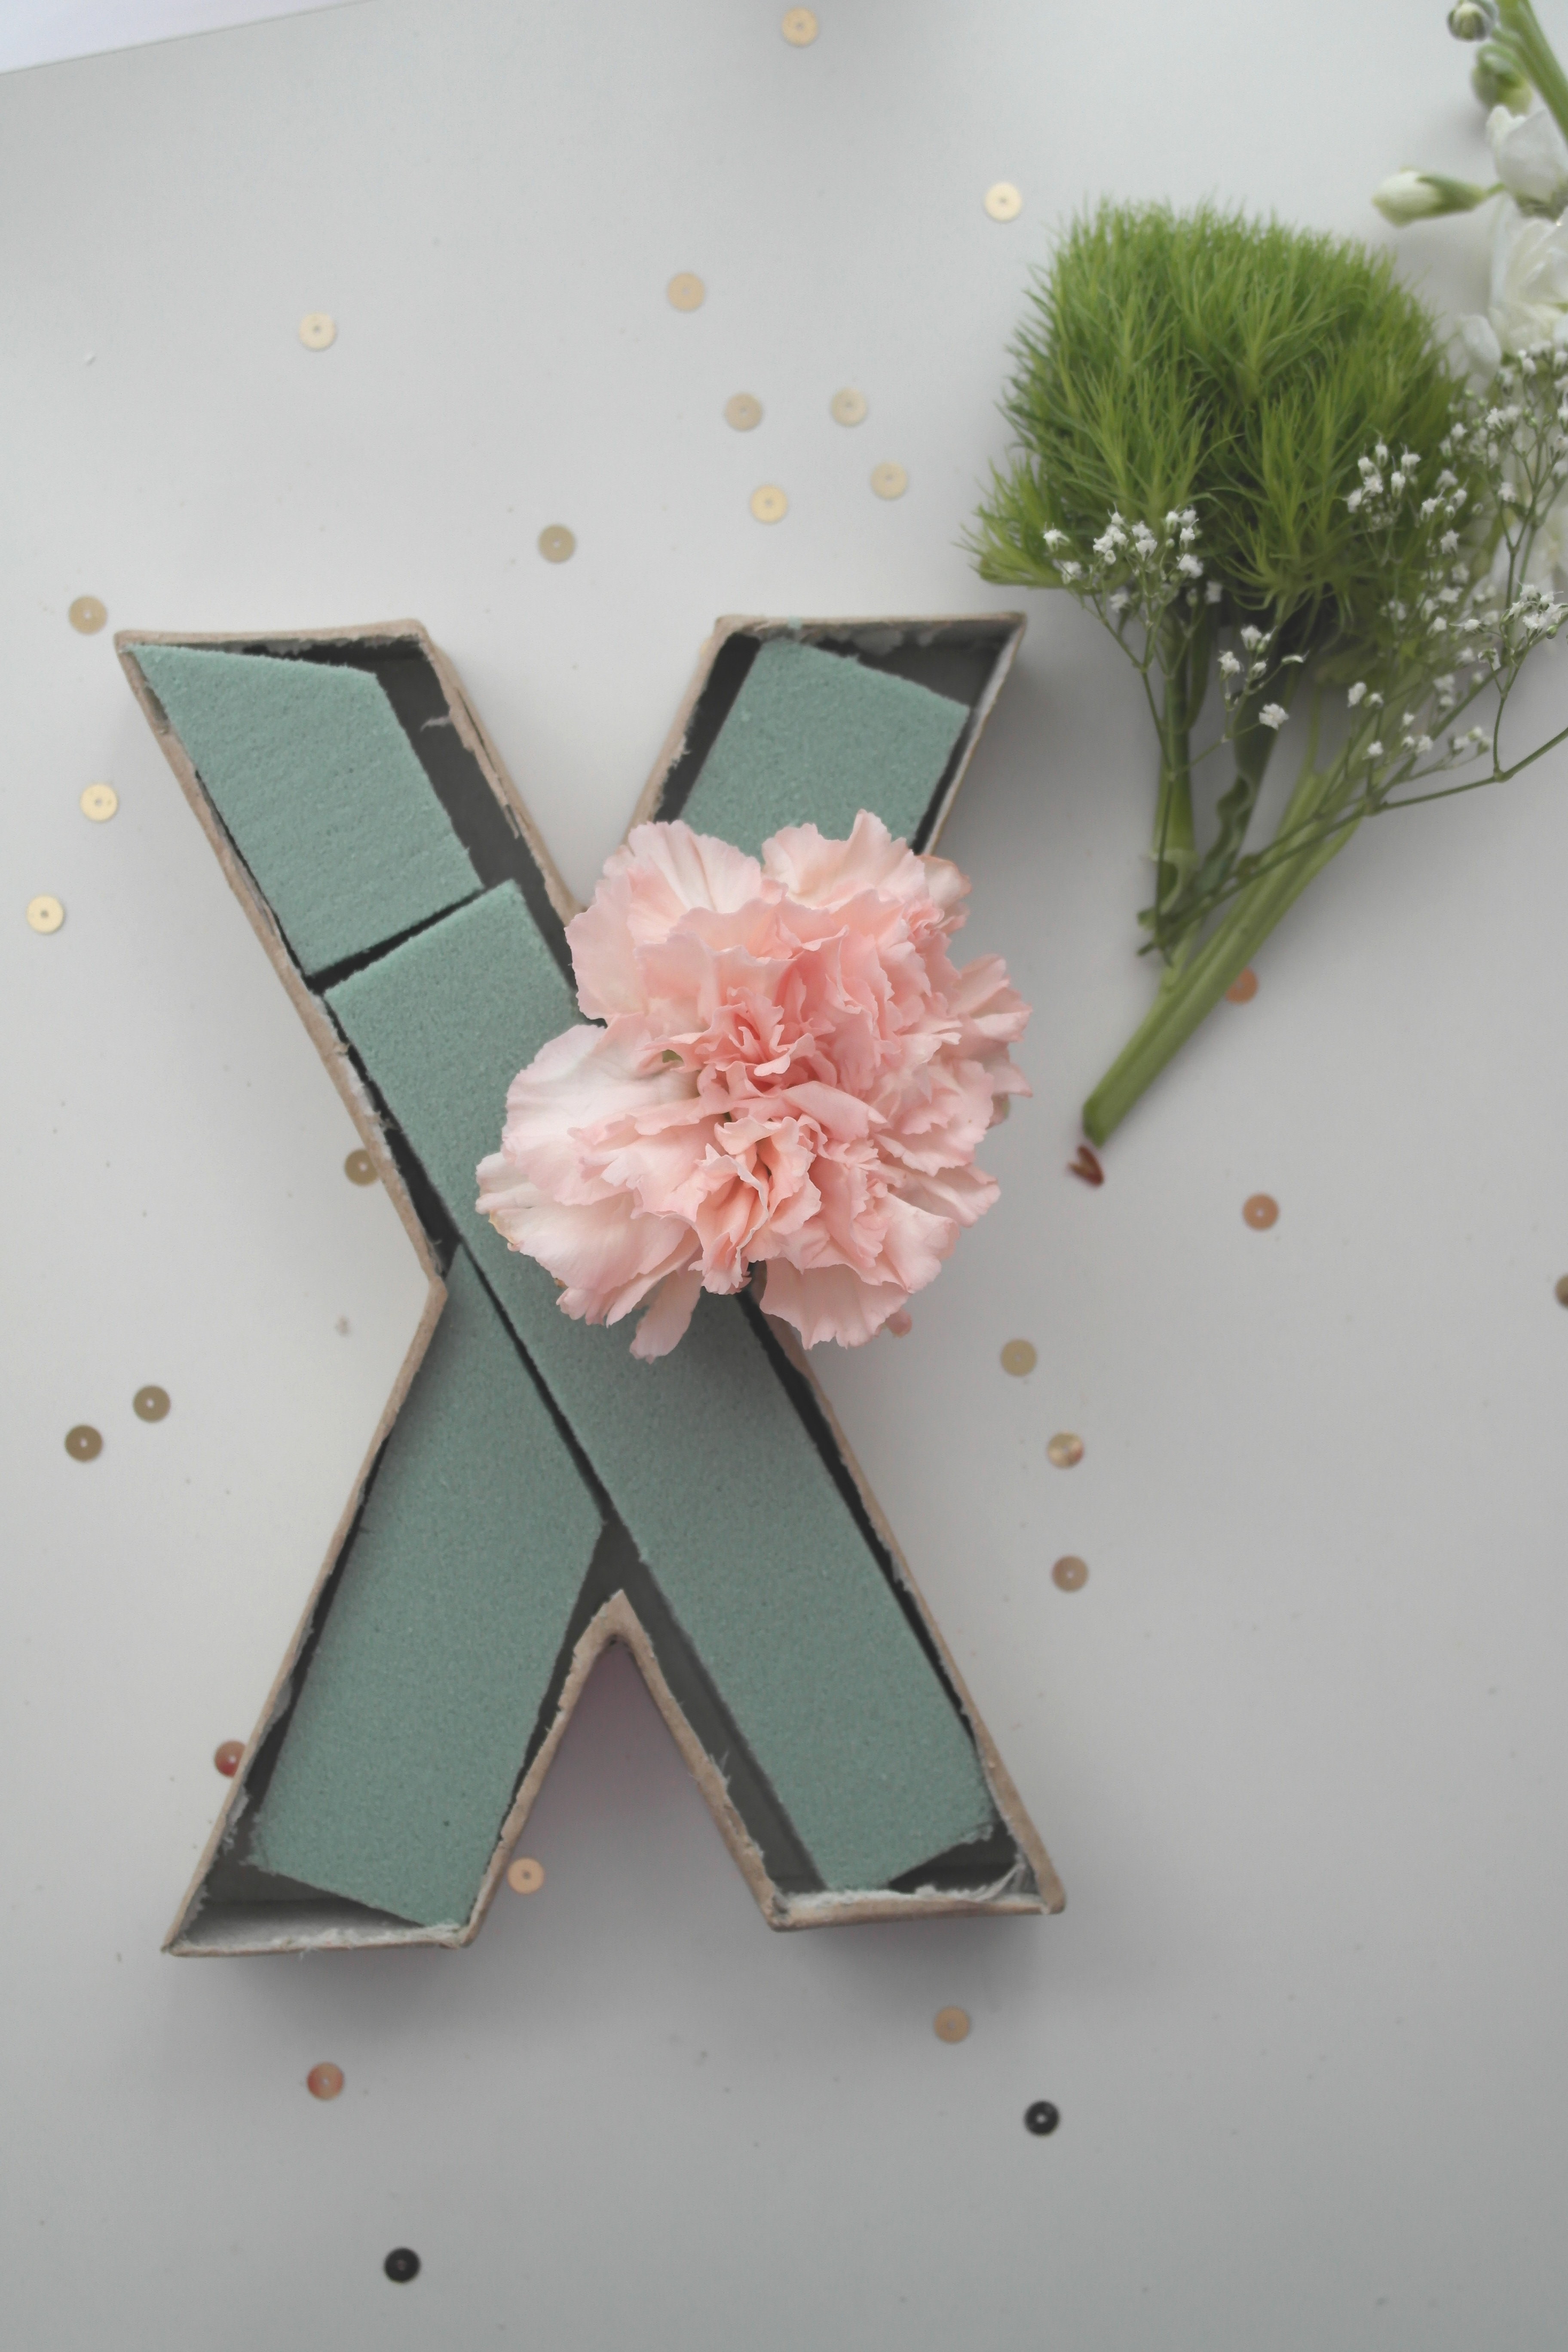

Make sure to arrange the flowers so that all of your floral foam will eventually be covered.

After placing all the desired flowers into the floral foam, you should have a fully arranged floral letter!

Step 6: Repeat the steps
Repeat steps 8& 9 for any additional letters.

You now have a uniquely gorgeous centerpiece, perfect for a bridal shower, baby shower, or more, that will be sure to wow all of your party guests!
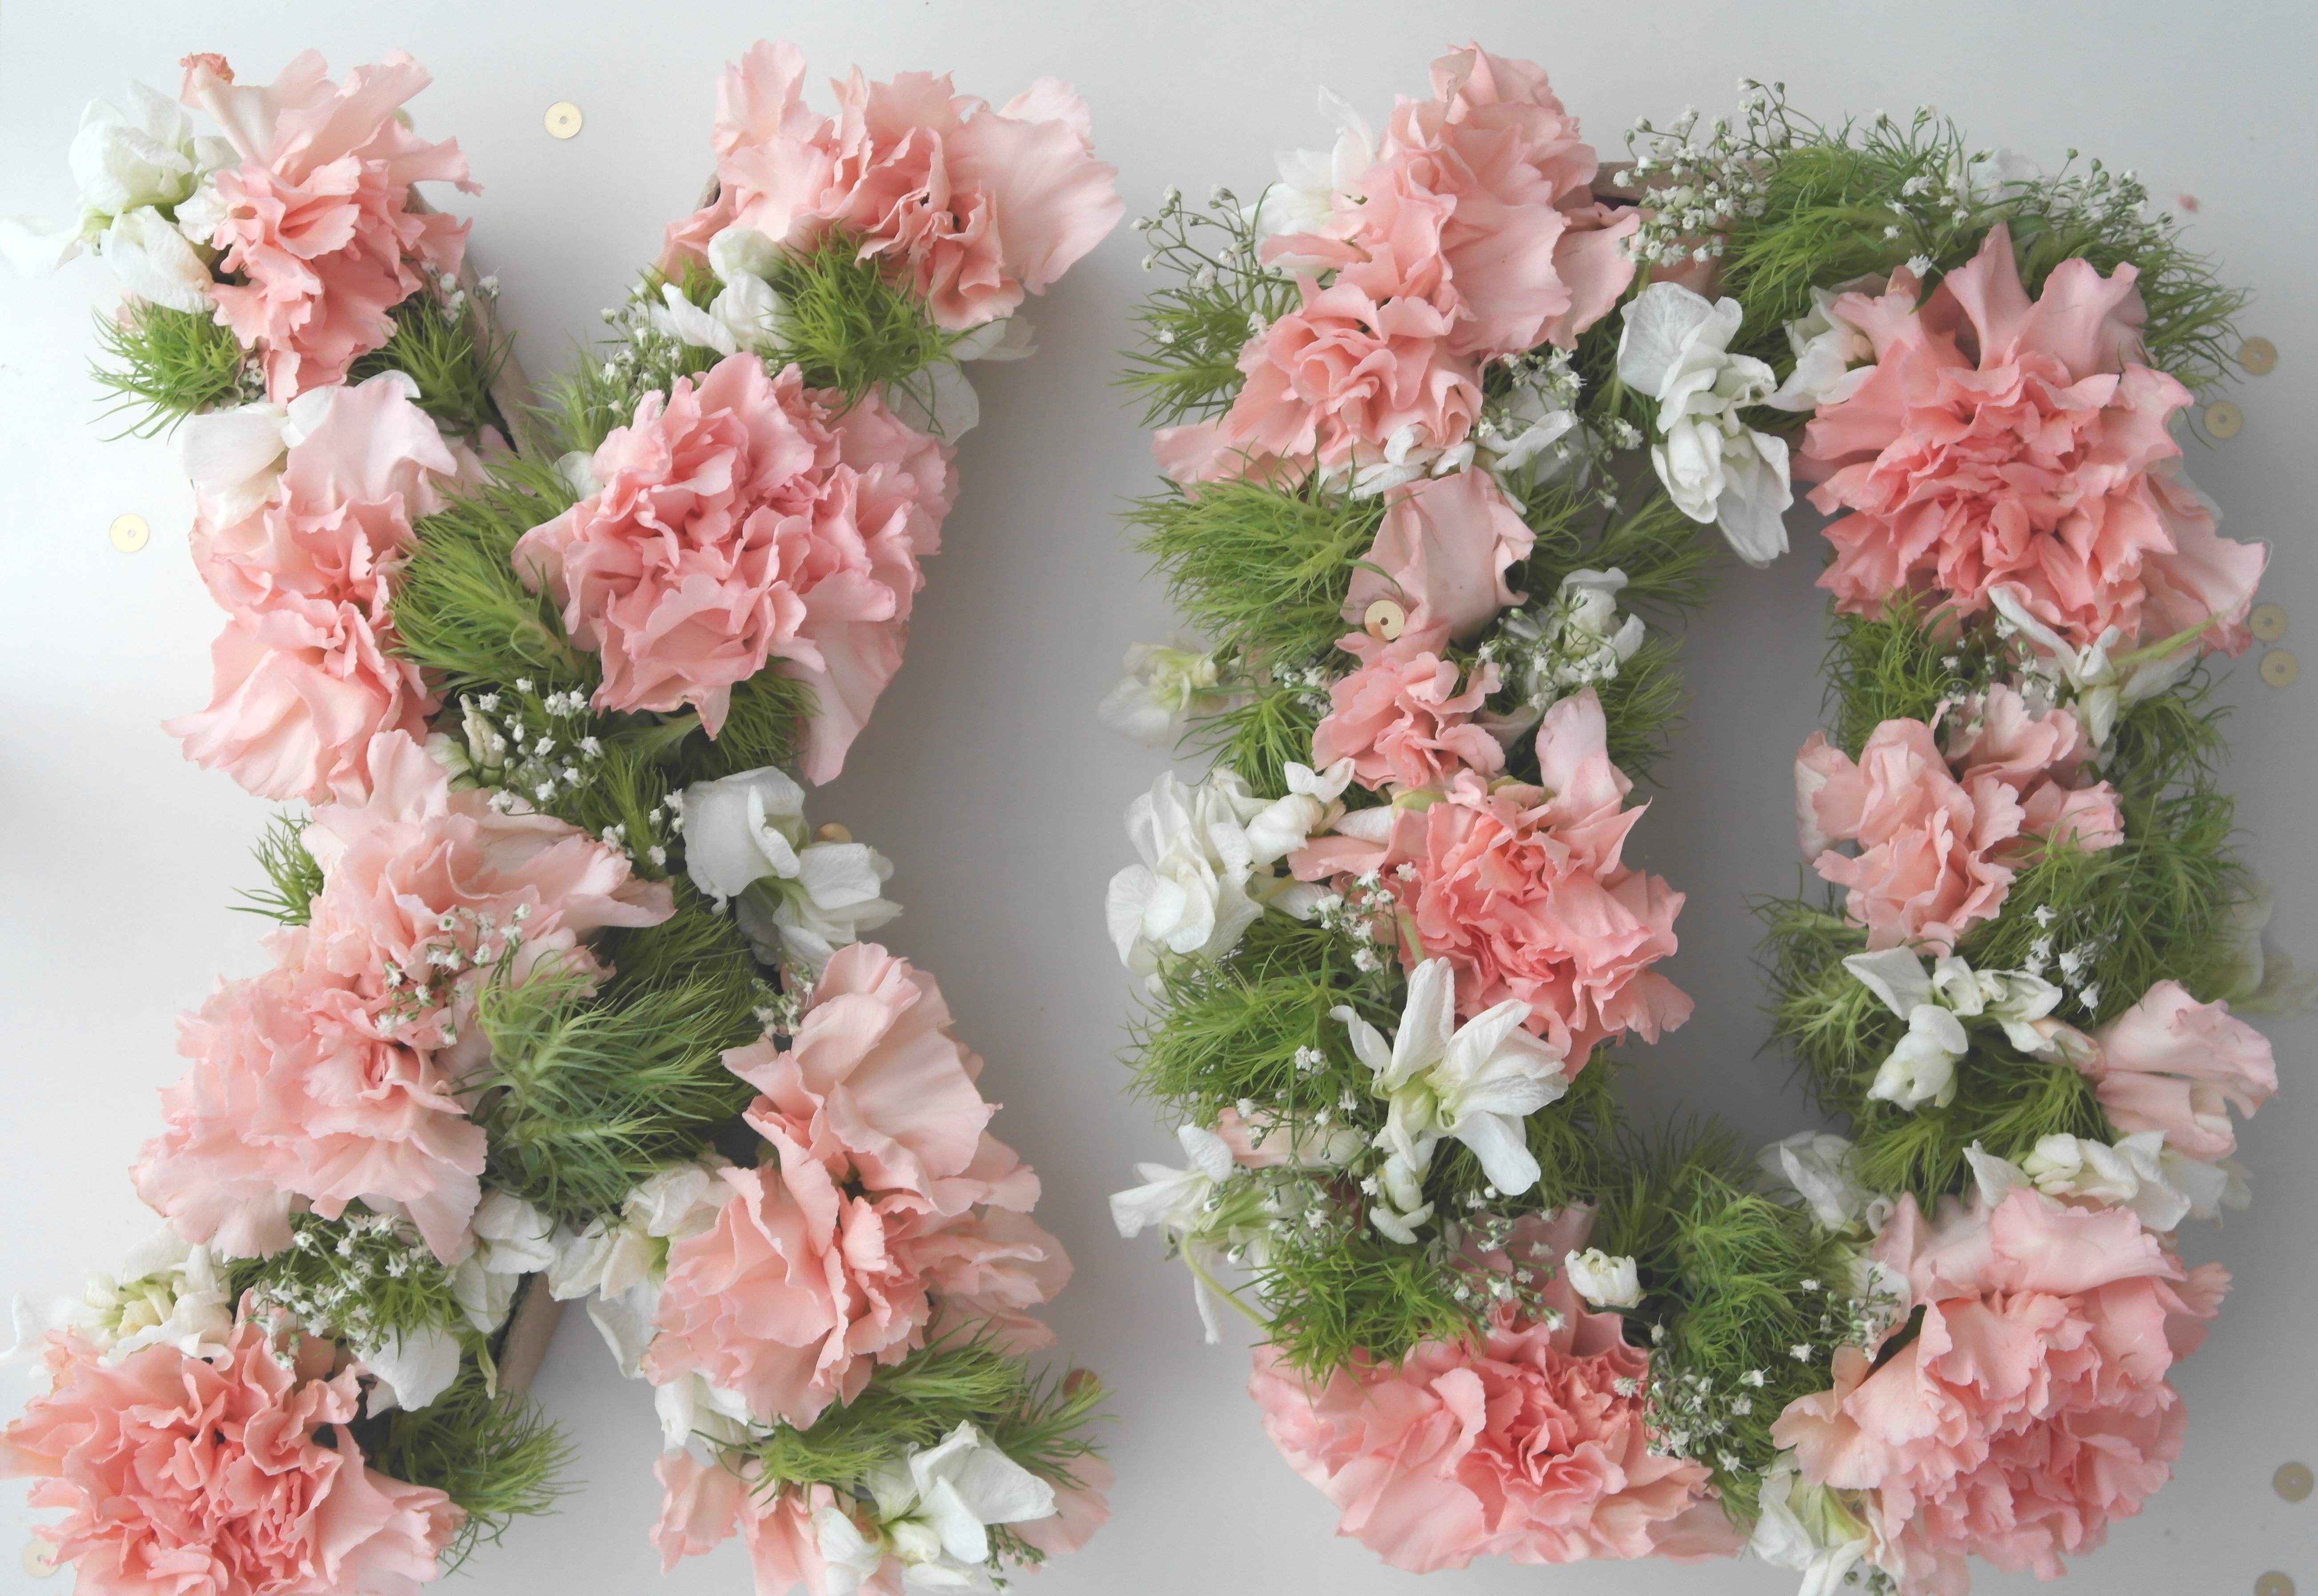
And knowing you hand crafted it yourself, makes it all the more special!

Thank you, Missy and Kristen, for sharing such a sweet and lovely party detail!
To learn more about Missy and Kristen, please visit them at Sweetly Chic Events & Designs, and on Facebook, Pinterest, and Instagram.
Tips and Substitutions
- Floral Wire: You can use floral wire to create a more stable base for your flowers, especially if you use larger or heavier blooms.
- Use dried or silk instead of fresh flowers!
- Greenery: You can add greenery to your centerpiece to create a more natural and organic look.
- Ribbon or Twine: You can use ribbon or twine to add a decorative touch to your centerpiece or to hang it on a wall or door.
- Consider non-floral elements: Non-floral elements like feathers, berries, or even fruit can add interest and texture to your centerpiece.
- Add a personal touch: Consider adding a personal touch to your centerpiece by incorporating items that have sentimental value. You can use family heirlooms, photographs, or even natural items like seashells or pinecones.
- Get creative: The sky is the limit with what flowers to choose – whether you love pink roses, white orchids, cream roses, yellow daisies, peach roses, white roses, pink orchids – you get the point. You can also choose other plant types.
FAQs
If you’re using fresh flowers, your centerpiece will last for several days if properly cared for. If you’re using silk flowers, your centerpiece will last for years.
If you’re using fresh flowers, it’s best to make your centerpiece no more than one day in advance. If you’re using silk flowers, you can make your centerpiece as far in advance as you like.
Yes, you can customize the colors of your floral centerpiece to match your event. Use flowers in different shades of the same color, or mix and match complementary colors.
If you’re using fresh flowers, be sure to keep them hydrated by adding water to the floral foam regularly. Keep the centerpiece out of direct sunlight and away from heat sources. If you’re using silk flowers, you can simply dust them off with a soft cloth.
Other DIY Decor Posts You’ll Love
- Glittered champagne flutes
- No-sew ruffle tablecloth
- Lace mason jar centerpieces
- Rustic floral centerpieces
- Decoupage cake stand
This floral centerpiece looks so professional and will totally take your setup to a new level.
Please let us know if you try it out!
Equipment
- Paper Mache Letters
- Fresh Flowers
- Floral Foam
- X-Acto Knife
- Hot glue gun
- Scissors
Instructions
- Start by taking your X-ACTO knife and cut into the front of your first letter where the side and top seam meet.
- Steadily continue to cut along your letter’s top front seam, leaving the back and sides of your letter intact.
- Repeat this step with any additional paper mache letters.
- Using your X-ACTO knife cut your floral foam and down to size so it fits within the hollowed space of your letter.
- Once you have the necessary pieces sized, carefully hot glue them into the letter.
- Now, repeat steps for any additional letters.
- Next, select chosen flowers and cut them so you have the buds of the flower and a bit of the bud stem remaining. (Approximately ½ inch of stem)
- Carefully place and arrange your flowers into the floral foam. No need to secure the flowers with glue, as the foam will hold them into place!
- Repeat steps for any additional letters.
add your comment
To leave a comment Log in -or- Join the party