
Creating this Glam Origami Butterfly Chandelier is a great way to add a gorgeous custom element to your party, in a very budget-friendly way!

Best of all, this glam and girly chandelier can be repurposed after the party, by hanging it in a bedroom for a feminine and fun touch!
Glam Origami Butterfly Chandelier
Supplies:
–Needlepoint hoop
–Sequin elastic
–Hot glue
–Fishing wire
–Square crafting paper
-Scissors
1. Gather your supplies, selecting paper colors to match your event decor (we opted for pink and mint ombré combination!) We also selected a 12 inch needle point hoop, but you can choose any size depending on how large or small you want your chandelier to be.
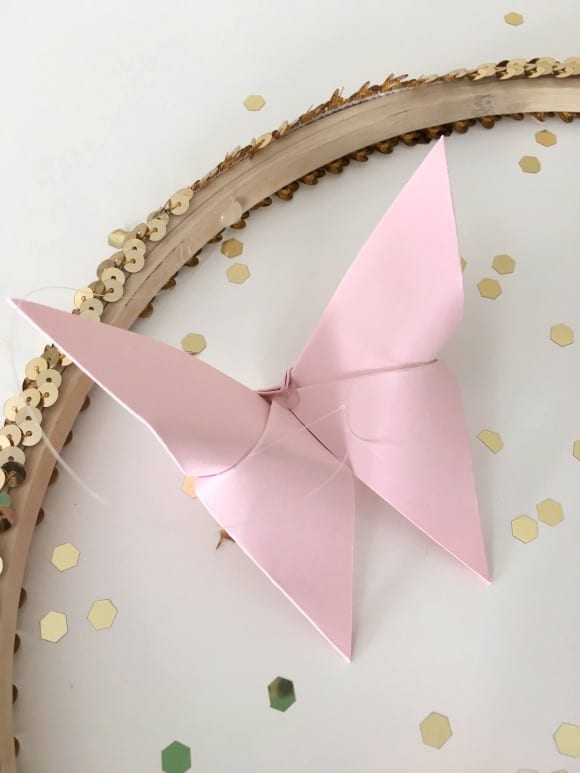
2. Begin by following the folding steps in the images below to create your origami butterflies. Repeat until you have the desired amount of butterflies. After following the steps you will have a gorgeous paper butterfly!
 We created 3 butterflies in each selected color, for a total of 18.

3. Next, gather your needle point hoop, hot glue and sequin elastic. You can find these at your local craft store.
4. Begin hot glueing your sequin elastic around the perimeter of the hoop until the entire circumference is covered.

5. Next, collect your assembled butterflies and your fishing wire.

6. Leaving plenty of extra length, cut a piece of fishing wire (to roughly 18 inches) and start tying them around the middle of your butterfly. We used a slip knot which allowed us to tighten just right. Repeat until all of your butterflies are secured with fishing wire.

7. Start gluing the other end of your fishing wire to the inside of the hoop, ensuring each is glued to the height you desire. We opted to do each color at slightly different lengths for a cascading effect. Trim off excess length with your scissors. Repeat until all of your butterflies are adhered to the hoop.
8. Lastly, using excess elastic or fishing wire, adhere 2 ends to the inside of your hoop and hang!

You now have your very own, custom chandelier to display at your next event or use it to add a touch of femininity to a girly bedroom! Enjoy your brand new chandelier!
This stunning post was created by our craft contributors Missy and Kristen from Sweetly Chic Events & Designs! To learn more about Missy and Kristen, check them out on their site, and also on Facebook, Pinterest, and Instagram.
add your comment
To leave a comment Log in -or- Join the party