Yarn-Wrapped Ombre Monogrammed Letter

These monogrammed letters are one of our most popular crafts and are a great party decoration or piece of home décor.
These monogrammed letters are one of our most popular crafts and are a great party decoration or piece of home décor.

Set aside those Christmas gingerbread houses and make way for this Valentine's Day Love shack treat!

Party decorations are what bring a party to life, and if yore like me and love making your own decorations, you won't want to miss this gorgeous glam sequin monogram letter DIY.

If you're looking for a quick, easy party favor that kids will love, look no further!

Here's a super fun way to welcome Santa into your home this Christmas. Have your kids make their own cookie plates using this Santa cookie plate DIY! These are so simple to a make and will get your kids excited for Christmas.
Then remember, on Christmas Eve, leave cookies and milk out for Santa because he does have a big job to do and might get a little hungry!
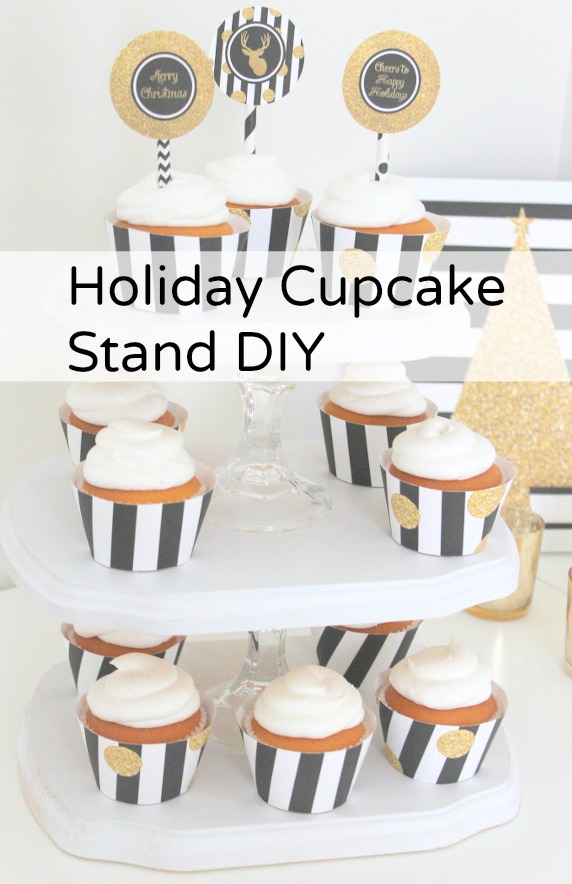
Here's a quick and easy cupcake stand DIY that's perfect for the holidays from Kristen and Missy from Sweetly Chic Events & Designs!
Today we are sharing a perfectly simple and inexpensive way to display all of your party sweets and treats! Whether for your next holiday party, or birthday celebration, this DIY 3-Tiered Cupcake Stand will allow you to showcase your delicious desserts with the perfect touch of chic simplicity:

Kristen and Missy from Sweetly Chic Events & Designs are here with an easy Santa Mason Jar DIY that is simple to do and oh so cute!
With Christmas just around the corner, it's time to think about a creative gift that would be the perfect way to say Happy Holidays to teachers, neighbors, family and friends! We don't know about you, but with so many special people on our list, we wanted a gift that was simple, budget friendly, but still chic and unique!


