Posts Tagged ‘Ruffle’

DIY Tutorial From a Catch My Party Member - How to Make a Shabby Chic Ruffle Garland

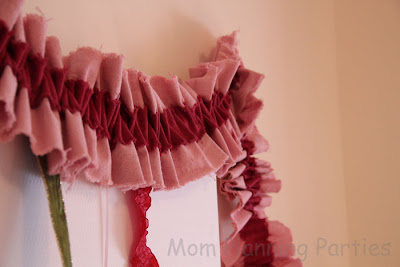
I saw this ruffle garland in the photos of Leslie I's 60th Birthday Tradtional Tea Party and I fell in love. I'm always drawn to things that are a little unfinished or rough around the edges and that's what drew me to this garland.

I asked Leslie is she'd put together a tutorial for us and she had already done so on her blog. Lucky us! Here it is...

One of my favorite elements from the Tea party last month was the ruffle garland I made by hand.  I have been crushing on the Hank and Hunt garlands for a while now (Etsy shop, Blog), but being the kind of person I am, I just had to try to DIY a variation of it for myself. I just knew that the burlap would work well, and it really was perfect!

(Clarification:  I didn't have time to take pictures as I was making the actual garland for the party, so I used fabric scraps I have lying around the house to make a mini version for this tutorial)

Here's how you do it:

1) Get yourself some awesome fabric.   (I used a natural burlap that I bucket-dyed to match the color scheme of the party.  The pink was RIT Petal Pink, and the red was a combination of RIT Scarlet and Wine.)

Shown: Two coordinating fabrics, heavy duty thread & needle, six inch wide clear ruler & a pair of really good scissors!
2)  Measure out the length of your garland.  Because I used such a generous stitch, I found that I needed about 60% more length than the finished product needed to be.  Seriously, these things take a lot of fabric!  Fabric saving tip: Get your fabric half the total length and sew the two pieces together once ruffled.  (Can you tell that the garland above the buffet is actually 6 pieces sewn together, and the garland on the hutch is actually 4 separate pieces?)

3) Cut your strips.  Don't worry about making perfect cuts.  In order to keep the width fairly consistent, I found it good to have a ruler lined up to help keep things somewhat straight.  I aimed for the wide strip to be about 6 inches wide and the layered strip to be about 2 inches wide.

Cutting the fabric
Finished cuts - notice the jagged edges!
4: Layer and sew.  Layer the narrow fabric strip on top of the wide fabric strip; aligning one of the short ends together.  Sewing by hand, sew a single stitch all the way down the center of the fabric.  Keep the stitches small on the top side and wide on the bottom side.  Again, don't worry about keeping things perfect.  Some of the uneven stitches will help create more character and dimension.  Also, don't be surprised if the top layer ends up being shorter than the bottom layer.  It will naturally bunch a little higher, so make sure you have quite a bit extra length.

Line up the fabric pieces
Start sewing.
Close-up of the stitches from the top.
5)  Scrunch and finish.  Gently push your fabric down the thread line until you get your desired ruffle effect.  Now you can go back and tie off your thread at the end of the ruffle.
Fabric scrunched down the thread.
Finished garland
And now you have your own 'seamless' ruffle garland!

Thank you, Leslie, for this awesome tutorial. If anyone makes a ruffle garland, please send photos.

Check out the rest of the photos from Leslie's 60th Birthday Tradtional Tea Party. You'll love the ruffle cake and tea cup favors.  Also, to learn more about Leslie, please check out her blog, Pampers, Playdates and Parties, for more great party ideas and inspirations.

I Blog for Spoonful
Creative Juice Cafe
Mimi's Dollhouse
Deezee Designs
Creative Little Stars
cupcake express
Party Plan-It Designs
Cutie Patootie Designz
Tres Chic Party Designs ~ Custom Party Decorations & Affordable DIY Printable
Via Blossom
Maple Craft
DimplePrints
Jamene Invitations
Heather Renee Celebrations
Bloom Designs Online
Cutie Patootie Creations
Lauren Haddox Design
missrubysue
Bird's Party Shoppe
Alki Party Treasures
Charmios
MyFriendBeth.com
Great Graphics
 A Sweet Celebration - Wrap It Up, LLC
Partystock
Piggy Bank Parties
Sweet Kaity
Pass The Scissors
Gift Baskets
DK DeleKtables
MyGrafico Digitals
Noteworthy Printables
Pink Owl Party Studio
Spiral Sage
The Trendy Butterfly
BonaCeri
PrimoPrintables
2 Cute Party Prints
Party Pop
Your Blissful Day
Becca Lee Paperie & Design
Kim's Clip Art Shop
Tikkido
The Tiny Tiara
Sassaby {DIY Printable Parties}
Sweet Shop Design
Print & Cut Your Printables
FishScraps
Prettygrafik design
Simply Stamped
Strawberry Mommycakes
Confetti Prints
Stockberry Studio
JW Illustrations
Pinata Paradise
PurpleTrail
Bailey Had A Party
Party Bazaar
delightfulprints
Sweets & Treats Boutique
Ellison Reed
Love Pretty Garlands
Freshly Cut Cards
So Sweet Party Shop
Plates & Napkins Party Supplies
Polkaprints Cards + Prints
Bella Bella Studios
Cherries n' Berries
Parties By Alex
Giggles & Grace Designs
Squared Party Printables
Cakeadoodle
Boopteylu
Stitchinnetka
Taffie Wishes
Forever Your Prints Design Studio
Stork Baby Gift Baskets
Enchanting Details Event Planning
LabelsRus
Fancy That
Wedding Party Favor
Hello Love Designs
Lily Pie Studio
Sonya DeHart Design
Unlimited Party Themes
Auntie's Sweet Life
Classic Hostess

Categories