Alice in Wonderland Luncheon
 By Jennifer P in Tea Party


Party Recap
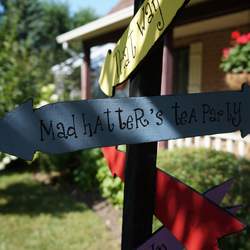
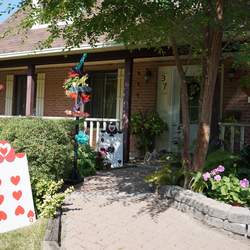
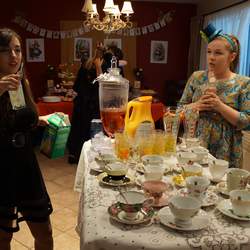
After a month of planning and crafting we finally had every inch of the house decorated, front and back yard included! All that was left was to brew some Queen of Tarts and Pink Flamingo tea, complements of David's Tea Shop. Each guest was given a handmade mad hatter hat on a headband or a playing card flower hairpin. With their invitations, each guest received a skeleton key with a number, which was to be brought to the party for a door prize draw.
Party Highlights
-
What People Ate
Ham and cheese scone sandwiches, spiral cone egg salad and chicken salad sandwiches, mini quiches, macaroni salad, green lentil Greek salad, quinoa salad
-
What People Drank
Queen of tarts tea, pink flamingo tea, coffee, lemonade
-
Desserts
macaron, vanilla cupcakes with raspberry buttercream icing, vanilla frozen yogurt with fresh berries,
-
Party Favors
Tea tray with a mini bottle of tea leaves.
-
Activities / Games
door prize draw, guess how many meringues are in the jar (67 3/4), flamingo croquet
Party Helpers
-
Ron
Carpenter, decorator
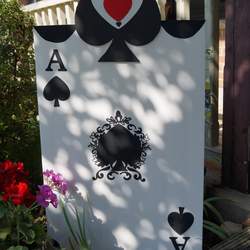
My dad designed and cut all the arrows for the sign as well as assembled the sign pole, built our awesome rabbit hole tunnel, created our flamingo mallets, and assembled the playing card soldiers, just to name a few things.
-
Josie
Crafter, decorator
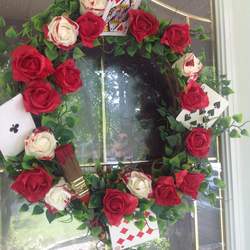
My mom headed all crafty projects! She hand made the chandelier tea cups, the royal croquet court sign, painted and decorated the papier mache white rabbit, made the awesome wreath and table top topiaries, and helped make the mad hatter hats.
4 comments
Asuanta T wrote:
Did you make this? And if so how?
Jennifer P wrote:
Yes I did! I bought a Wilton cake stand at Walmart and lined each layer with sheet moss, then decorated with loose artificial flowers, leaves and mushrooms. The dragonfly and butterflies came from the Dollar Store and had alligator clips on the back, so they’re held in place using those. To decorate the poles between each tier I overlapped playing cards by a few centimeters (maybe half an inch) and glued them together using double sided tape, then wrapped them around the poles and held them in place with the ribbon that was also glued with double sided tape on the back. I had a small china set, so I hot glued the teacup to the saucer and glued the saucer to the top tier. The other cups are just resting on the tiers. Lastly, I printed illustrations from Alice in Wonderland on sturdy cardstock, colored them in using pencil crayons, cut them out with a utility knife and placed them in the moss so they’d stand on their own, or lean in such a way that they looked like they were standing on their own.
Amo R wrote:
I love the Card Soldiers ! Please share how you made them. I would love to make a few for my party
Jennifer P wrote:
I bought project boards from Dollarama (the kind with foam inside) for the bodies, regular poster boards for the heads and designs, and googley eyes. Taking the Ace card as an example: I used a Cricut machine to cut out the letters and every heart you see, then hand cut the stems for the spades and the semi-circles for the shoulders. I cut a BUNCH of embellishment designs and florets that I symmetrically arranged around the centre spade until I felt happy with the design and glued everything down. You can hand cut your own heart patterns, use poster die-cuts for the letters and numbers (also available at Dollarama or Dollar Tree) and just have fun with it! To stand them up, I think we staked the foam on the bottom of the project board used for the body with metal garden fence. You could also hot glue painting stir-sticks to the back and push those into loose soil.
To leave a comment Log in -or- Join the party